Sunday, May 30, 2010

Morrgan's Great Sewing Adventures, part 1

You may remember that I recently obtained a sewing machine. The first practise session after that previous post didn't go all that well. I spent most of it wondering why everything looked pretty on top, like this...


...while below it was a total mess, like this:


The machine didn't come with a manual, used as it was, so it took half an hour of fiddling with settings, running to the computer to google various search terms (it didn't help that I had forgotten most sewing machine terminology), and running back to the sewing machine to test something new, etc. In the end I was able to find the manual online and it turned out the problem was a poorly threaded machine. Yay, learned something new! Not-so-yay, I wasted all my practise time on figuring this out.

A few days ago I got the chance to try again. As it's been 15 or so years since I last did any sewing, I decided to start with a simple project: a fabric storage box for my yarns. A simple box shape, straight seams only, small and quick to finish - seemed perfect. After all, how hard could it be?

Well, pretty darn hard, it turns out! I haven't used ready-made patterns for 15 years either, so I just calculated some suitable rectangle shapes to sew together into a box. I will not tell you how I did it, because it was probably the silliest way to make a box, ever. For one, I added too little seam allovance. Second, I hadn't quite realized that sewing corners isn't all that straight-forward:


However, after much head-scratching, pondering, unraveling and resewing, I managed to get something vaguely box-shaped together!

So yes, it ended up a bit narrower than planned and yes, the corners are - ahem - interesting, but at least it does its job. And on the plus side, I still know how to sew a pretty straight seam.

I also put together a small list of a few things I need before the next project:


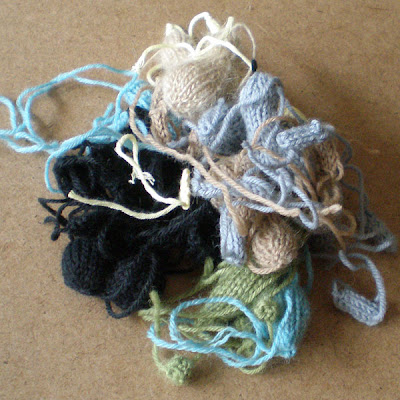
  • Sewing thread: This box ended up being sewn with three different colours of thread, because I only had snippets of thread around and had forgotten to buy more. Oops.

  • Fabric scissors: The all-round scissors I have are so blunt it's not even funny. They'll stay that way too, for they're used for all kinds of cutting. Best to have a separate pair just for this, methinks.

  • A nice and simple fabric box pattern: Any suggestions?

Thursday, May 27, 2010

My Creative Space: Many tiny creatures

This week, my creative space was first filled with many, many tiny bits and pieces of creatures-to-be...

knitted and crocheted tiny animals in pieces
...which I then turned into the actual creatures - lots of magnetic animals, like bats, dinosaurs, kiwi birds, sharks and more.

knitted and crocheted tiny animal magnets
Phew! I must admit my right wrist actually hurt a bit after finishing all those.

red fingerless gloves or armwarmers with a braid design together with a red rose But that didn't deter me for long, because this week I also finished a pair of arm warmers in a beautiful deep burgundy red. I noticed that the yarn used was the exact same red as one of my little roses on the balcony, which inspired me to try a new style of photos. What do you think?

red fingerless gloves or armwarmers with a braid design together with a red roseWant to see the creative spaces of others? Head on over to Kootoyoo's blog for a look!

Sunday, May 23, 2010

Flowery DIY Projects: Brooches

It's time for another crafty idea for my crocheted flowers! Here's a brief tutorial on how to use them to make brooches.

(For more ideas, check out the Flowery DIY Projects section.)

To start things off, here are a few examples to show the different sizes. The purple/pink brooch uses a large and a medium flower, while the beige/white and brown/orange are made with medium and small ones. The blue one, made with a large and a small flower, is used as an example in the tutorial below. The tiny buttons are 8-11 mm (5/16-7/16 in) in diameter.

Here's what you'll need: scissors, some tiny buttons, a needle, thread, safety pins or preferably proper pin back or bar pins, and of course some crocheted flowers.


Pick a couple of flowers and a matching tiny button - in this case a small dark blue flower, a large light blue flower and an iridescent blue vintage button. Pull a length of thread through the middle of the flowers, through the button holes and back through the flowers again.


Pull the thread tight to form the brooch.


Place the brooch pin on the back, loop the thread around it. Pull the thread through the flowers and button and around the pin a few more times until all parts are securely in place. Sew the pin in place with a few stitches. All done!

(A proper pin back would work better, but I had none available. A small safety needle will do the trick if need be, though.)

Thursday, May 20, 2010

My Creative Space: Something a bit different

This week I have actually been mostly working on the computer. I decided my creature PDF patterns were in great need of a facelift, especially the older ones, so I have designed a new layout with many new photos. I've also tweaked instructions here and there when needed, to make them more clear.

I'm very excited about this change! It's something I've wanted to do for a long time, but haven't had the time for until now. It takes quite a bit of time and energy, however - I've found that I can only redo one pattern per day. So far I've got a third ready, so I imagine it'll be a couple of weeks before all of them are ready for release.

Want a sneak peek? Here are the patterns for the goldfish and the piggy; old on the left, new on the right:


Once the new pattern layout is launched, I also have one or two new patterns to add to the shop!

If you have bought patterns from me before and want them in the new design, just send me a note (Etsy convo, email) once the new layout is available in my shop and I'll send you the new version, free of charge of course.


Want to see the creative spaces of others? Head on over to Kootoyoo's blog for a look!

Tuesday, May 18, 2010

Tuesday Finds: Rain

The weather has had a bit of trouble making up its mind lately. At "best" it's been bright hot sun at first, then 10 seconds of pouring rain, then sun again. Yesterday it was pretty and hot as can be in the morning, then storming and thundering in the afternoon. Let's see what today brings...


Sunday, May 16, 2010

The beginning of new exciting crafty adventures

Look look look! Look what I got!

singer sewing machine
Oh, what ideas I have to try out. The possibilities, they are limitless! So limitless in fact, that it kind of scares me. :D Will the apartment be inundated with not only yarn, but now fabric as well?

I'm not sure how to continue from here, as it's been 15 years since I last did any sewing on a machine, but that's also the age of this machine, so I hope we'll get along well. I also don't know if it's any good or not, but Singer is one of few sewing machine brands I recognize, as my mother has one that's about 100 years old and still works.

So, time to try it out and practise! The pile of fabric on the right is a bunch of 2nd hand drapes I scored yesterday for 1€ a piece for just this purpose. Wish me luck, and if you have any good hints or tips, let me know!

Thursday, May 13, 2010

My Creative Space: Django Ponies and Captain's Chairs

pegasus django pony pink white Mr Morrgan is a web developer and spends all his day with things like Django and Python. He's been rather excited about it and after showing me a picture of Django's unofficial magic pony mascot, I was excited too. Who wouldn't be excited about a flying, magical pink pony? About instantly I decided Mr Morrgan needed his own magical Django pony to help him out at work.

If you haven't heard of these terms before, perhaps this explanation may be of use. Mr Morrgan has tried several times to explain Django to me and I have also tried googling it, with little success. (Frameworks? High-level pythons? What?) This morning over coffee, however, he explained it to me beautifully with the help of Lego. It went something like this: if C is the plastic, metal and rubber used to make Lego, Python is the basic Lego pieces and Django the fancy, moulded special bits you can use to make neato space stations. Et voilà, it made perfect sense to me, who spent her childhood making über-cool secret bases, robots and said space stations out of Lego.

pegasus django pony pink white Onwards to the point! Meet Dee, Mr Morrgan's magic Django pony! She's knitted and crocheted from a wool blend, using the pattern for Hubert for the body. The wings are the part I'm really proud of, though. When I started on the first one, I still had no idea how to do them. But it all came almost automatically as I was working and they turned out even better than I had hoped. Joy!

By the way, the chair in the photos is one of my favourite places to sit and knit and is also where I made most of Dee. I think it's a fantastic piece of furniture. Look at the shape! The gorgeous red colour! Best of all, it spins and rocks and adjusts! Awesome!

pegasus django pony pink white Mr Morrgan doesn't agree, however. He thinks it looks like a prop from Star Trek of the 60s - hence we call it the Captain's Chair (we joke that I should get a Captain's Log to go with it). He wasn't too happy when I spotted it in a 2nd hand place just as they brought it in, but I vetoed his opinion. This chair is MINE and perfectly illustrates why I love going hunting for finds in 2nd hand shops.


I now await with trepidation when he'll use his veto right on my opinion of a piece of home decor, but it was worth it.


Want to see the creative spaces of others? Head on over to Kootoyoo's blog for a look!

Sunday, May 09, 2010

Flowers Galore

white easter cactus Spring is slowly making itself known around here and the plants are waking up from their "winter sleep". Some are further along than others and are happily celebrating with pretty flowers. I thought I'd share them, so be warned - there will be lots of photos (and a bunch of garden-type babbling at the end).

The white Easter cactus on the right is a new addition to my flowery herd, one I couldn't resist bringing home with me from the shop. Another two new arrivals are below; yellow and orange flaming Katies (English flower names are awesome).

yellow flaming katy orange flaming katy


Some of the oldies have gotten excited too, like this red-flowered Episcia.

red episcia
flowering anubias Even the aquariums have offered their share of flowers, surprising me with this Anubias shown on the right!

The balcony is pretty bare at the moment, but I have grand plans. Oh yes. Grand plans indeed.

herbs and indian cress Part of this plan is growing a whole bunch of plants from seeds this year. The lemon basil, coriander, parsley and indian cress are already off to a good start, while others (such as sweet peas and edible peas, marigolds and thyme) are still waiting to show themselves. Exciting times!


miniature mother's day roses red and white The balcony garden isn't totally plantless though. The one thing I really, really want in a garden are roses, so this week I picked up a few miniature Mother's Day roses for myself (sorry mamma! ;) and will see how they do. Hopefully they'll survive winter!

I'll keep one on its own, one is planted in the flower box below with some pansies and lobelias, and the third will go into the big wooden box with the woodbine, ground-ivy and Hosta (which all seem to have made it through winter, yay). Interestingly enough the roses all look different - we'll see if they grow and flower differently too.

Well, that's enough plant talk. There's more than this to my grand balcony schemes, but I'll reveal the rest another time!

yellow miniature mother's day rose pansies lobelias

Friday, May 07, 2010

Flowery DIY Projects: Necklaces

crocheted flowers in pink brown and beige, to be used as buttons pendants beads appliques Recently I went through a few piles of yarn and found quite a few leftovers from knitting projects. I wanted to make something useful out of these short bits of yarn and the idea of crocheted flowers came to me. I've made them before, but it's been years since the last time. I found it to be quite a fun little diversion from the usual knitting I mostly do these days.

My crocheted flowers are now available from my Etsy shop and I'll be listing more now and then. I made them to be used as buttons, so they're pretty stiff and sturdy. However, I realized there's many other uses for them too and wanted to share. This time I have a few photos of them used as beads and pendants for necklaces.


blue crocheted flower pendant necklace pink and purple crocheted flower pendant necklace
pink and purple crocheted flower pendant necklace

Have you made something from my flowers and want to show the world? I'd be happy to post a photo on this blog along with your name and a link to your website, shop or blog. Just let me know in the comments or through an Etsy convo!

Thursday, May 06, 2010

My Creative Space

The main joy in my workspace this week is the board I recently got to keep my magnetic creatures on. So tidy! So practical! And also so nice to see my creatures while I'm working at my desk. ;)

animal fridge magnets owls foxes kiwi birds elephants turtles etc plus yarn

Also pictured: the pile of yarn I picked up from a yarn sale recently, waiting to be sorted into storage. I did promise myself (and Mr Morrgan) not to buy any more until I'd used up one of the basketfuls I have... But it was so pretty and soft! And on sale! That makes it ok, doesn't it?

Want to see the creative spaces of others? Head on over to Kootoyoo's blog for a look!
Related Posts Plugin for WordPress, Blogger...